Make a spiral primary coil for a Tesla coil
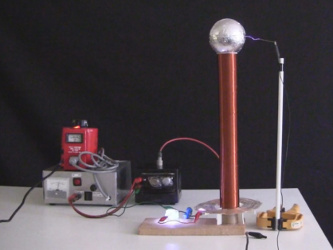
I wanted to try a spiral shaped primary coil with my small spark gap Tesla coil and so I made one. Here's how. There's also a video below.
How to make the spiral coil
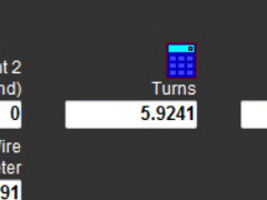
The first step to making a spiral primary coil for your Tesla coil is to work out the dimensions: how many turns do you need, how spaced apart should the turns be, ... It has to be worked out such that your primary circuit has the same, or close to the same resonant frequency as your secondary circuit.
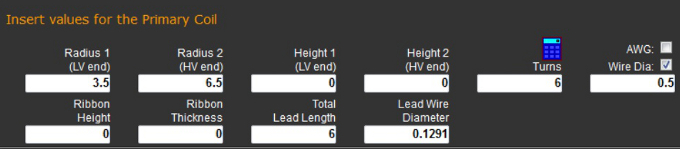
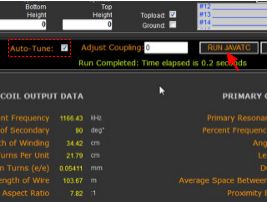
I did all my calculations using the online JavaTC Tesla coil calculator. Shown below are the relevant parts of the calculator's page, including the number of turns. Lower down on the page you can turn on Auto-Tune and then click on the RUN JAVATC button then you'll see that it replaces the number of turns you gave with a different number that's close.
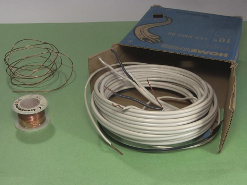
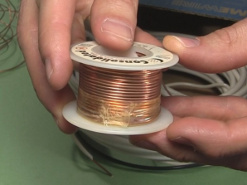
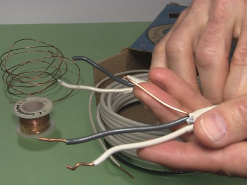
Since high voltage is involved, you want to use thick wire. Thin wire will tend to leak charge to the air. One source is to buy a roll of wire from an electronics store. In the photo below is some 16 gauge (AWG) wire. Another source is household wiring, available in some hardware stores. In North America that's usually 14 guage (AWG). You want bare wire for this one since you'll be tuning it by connecting to different places (explained more below.)
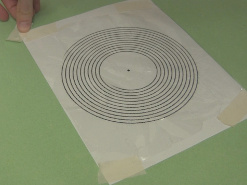
The next step is to draw a template for the shape of the coil on paper. I drew mine on the computer and you can download the results below. Note that it's designed for my small spark gap Tesla coil as worked out using the JavaTC calculator as I explained how to above. Two are given and the difference is in the directions the turns are drawn: clockwise vs counter clockwise. As shown in the photo below, use the one that's in the opposite direction as your secondary coil.

|
spiral_clockwise.pdf - 47KB, PDF file |

|
spiral_counter_clockwise.pdf - 47KB, PDF file |
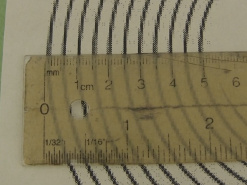
Once you've downloaded it, adjust the size before printing it such that there's around 1/2 centimeter spacing between the turns.
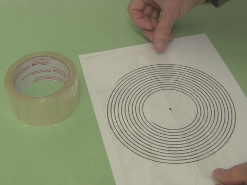
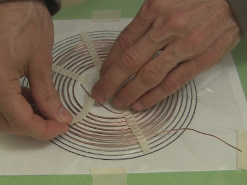
As shown below, lay some clear packing tape on top of the paper but with the sticky side facing up. Overlap the strips of tape so that they stick together. Then use some more tape to tape that down onto the template. I'm using masking tape since its more visible for illustration purposes. Finally, I tape that to the table to make it easier to work with.
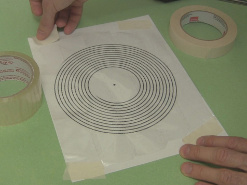
Next, start doing the actual winding by pressing the wire down onto the sticky tape (remember, you'd put the sticky side facing up.) Notice that I left a length in the middle for connecting to the power supply later. Once you've done the number of turns you need, plus one or two extra turns, cut it. You won't need any extra wire sticking out at this end.
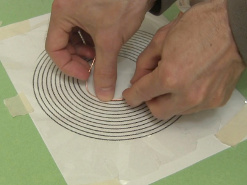
As shown below, I then put a few thin pieces of tape to further tape it in place.
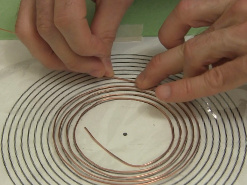
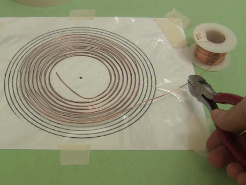
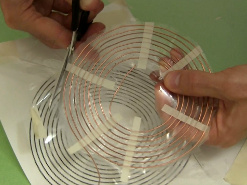
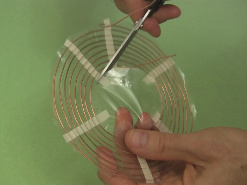
Finally I cut the coil free, including a hole in the center.
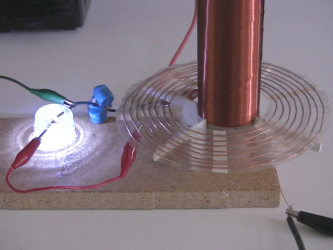
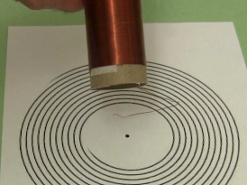
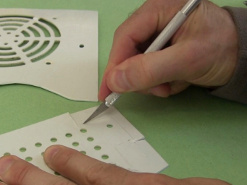
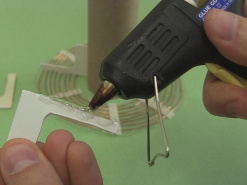
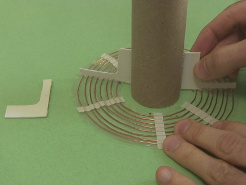
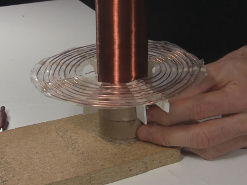
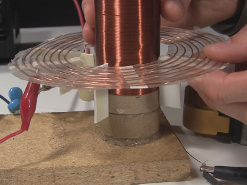
I then cut some legs out of scrap plastic from something I'd taken apart. You can also get plastic from hobby stores. I hot glue those on such that altogether they press on the secondary coil and its tube a bit. Note that the cardboard tube you see in the photos below is there just to act as a guide; I'm not gluing to it.
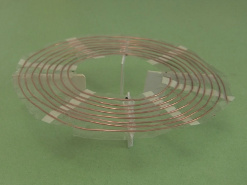
And below is the resulting spiral primary coil.
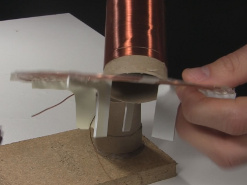
For my small Tesla coil, I put it in place by lowering the secondary through the center of the spiral, and then lowering all that into place on the base.
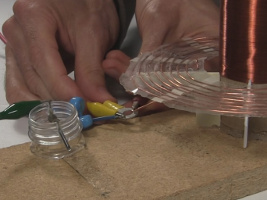
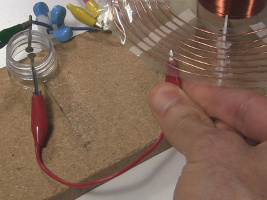
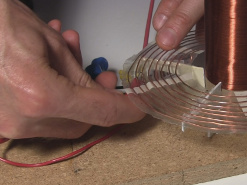
For my Tesla coil, Using an alligator clip I then connect the positive of the power supply, one wire from the capacitors and the piece of wire extending from the center of the spiral coil together. Then I connect a wire with alligator clips on either end coming from one side of the spark gap to the spiral primary coil where I figure there are the correct number of turns from that connection point to the center of the coil.
Tuning the spiral primary coil
There are two ways you can tune the coil to get better results. The first is to change where you connect to the spiral using the alligator clip. The second is to change the height of the spiral with respect to the secondary. To tell if your changes are better or worse, you can put a needle connected to ground as far from the topload as you can while still getting a spark. Any changes that make this distance longer is an improvement.
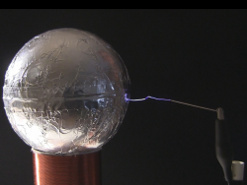
And here's the end result.
Video - How to Make Spiral Primary Coil for Tesla Coil
In this video I show step-by-step how to make the spiral primary coil and how to tune it, along with a few demonstrations of it in action.
