How to make a bottle rocket
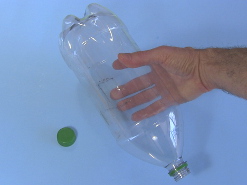
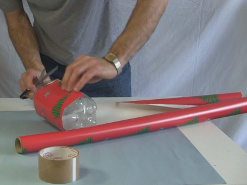
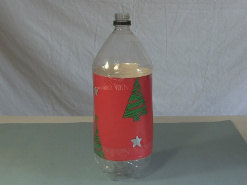
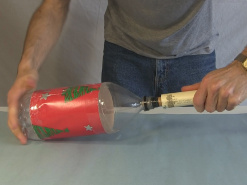
Here's how to make a bottle rocket, a rocket that's simply a soda bottle partly filled with water and compressed air that actually flies. As you can see below, you'll need some sort of launching system, and that's where the work in making one comes in. The actual bottle part is easy. Don't be misled by the redness of the bottle, that's just red wrapping paper wrapped around it to make it more visible.
How to make the bottle rocket and launch pad
There are two things to make. One is the actual bottle rocket and the other is some sort of launch pad.
How to make the rocket
As shown below, making the bottle rocket can be as simple as getting a soda bottle and removing the cap. However, you probably want to add some color to it since a transparent bottle isn't very visible against the sky. You can paint it or do whatever you want. In my case I wrapped some red Christmas wrapping paper around it.
How to make a launch pad
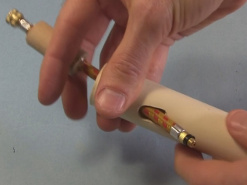
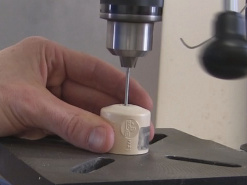
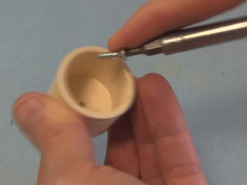
As shown below, I first find a bicycle pump that has a removable hose. I need it to be removable because I'll be putting a plug around the hose. For the plug, I find a piece of dowel that fits inside the bottle's opening. I then drill a hole in the dowel that's the size of the hose.
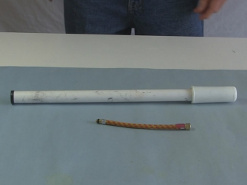
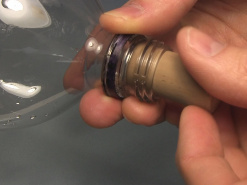
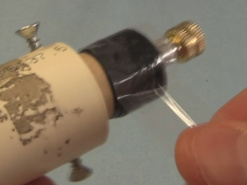
The hose goes through the hole and hot glue is inserted into the holes at both ends to make it watertight.
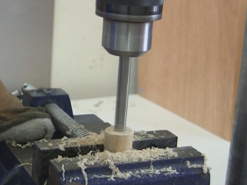
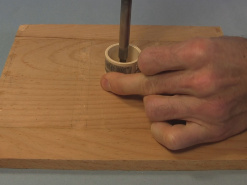
The I find a PVC tube that has an inner diameter that's has a little larger inner diameter than the diameter of the dowel, and drill a hole near one end. This tube will be the launch tube part of the launch pad. The diameter of the hole is a little larger than the diameter of the hose since the hose will be passing through it. It should be large enough for the hose to move easily through it i.e. it shouldn't be a tight fit.

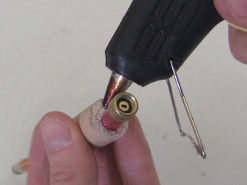
As shown below, after enlarging that hole I insert the hose. I wrap tape around the dowel until it's a snug fit when inserted into the PVC tube.
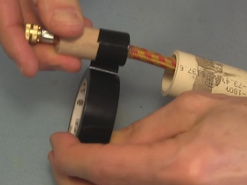

I also increase the diameter of the other end of the dowel by wrapping tape around there too, until it's around the same diameter as the opening in the bottle.
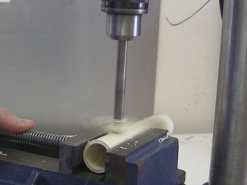
I then drill another hole in the PVC tube where the tape is wrapped around the dowel and then put a screw into the hole until I feel it penetrate the wooden dowel a little. This is to lock it in place.
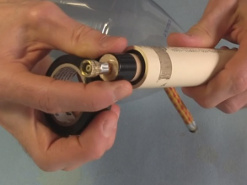

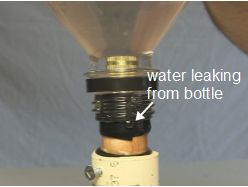
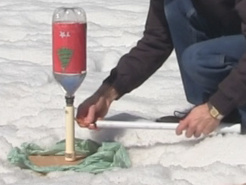
With water in the bottle rocket, I then put it on the launch tube. As you can see below, some water leaks around the tape. So I add some thinner tape, packing tape, which seems to complete the seal.
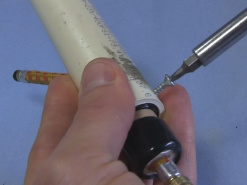
As shown below, I next get a PVC cap that fits the PVC tube and drill a hole in the end. I insert a screw in the hole and screw the cap firmly down to a piece of wood.
Finally I lower the launch tube firmly onto the cap, completing the bottle rocket launcher.
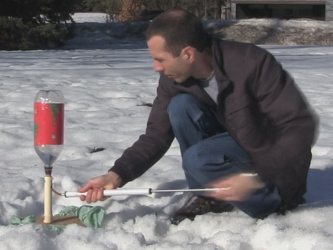
I take it outdoors and attach the pump to the hose, and begin pumping.

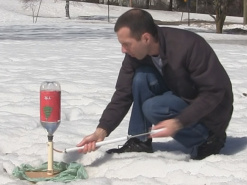
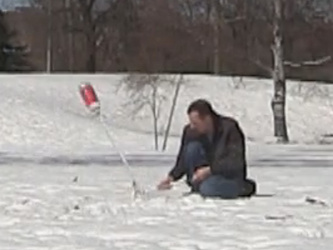
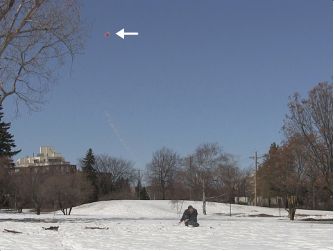
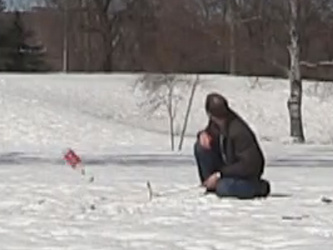
Lift-off of the bottle rocket from the bottle rocket launcher!
Video - Bottle Rocket - How it Works/How to Make
The following video shows not only step-by-step how to make this bottle rocket and launcher but also explains how the rocket works.
