BB-8 Droid from Star Wars (v2) - Homemade/DIY
This is a work-in-progress of version 2 of my BB-8 droid. The motor in version 1 wasn't strong enough to enable the use of a full featured dome that would stay on (the head is commonly called the dome).
So for version 2 I decided to:
- use powerful drill motors and drill batteries from cordless drills,
- switch to a tank/differential drive so that it can turn better,
- add sounds,
- eventually add inertial management for more stability.
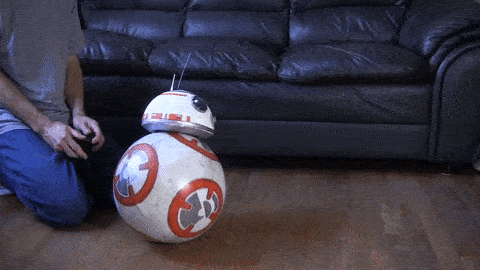
In the animated GIF below you can see it's working well as of November 9, 2016, though there's still some stability improvement to be made.
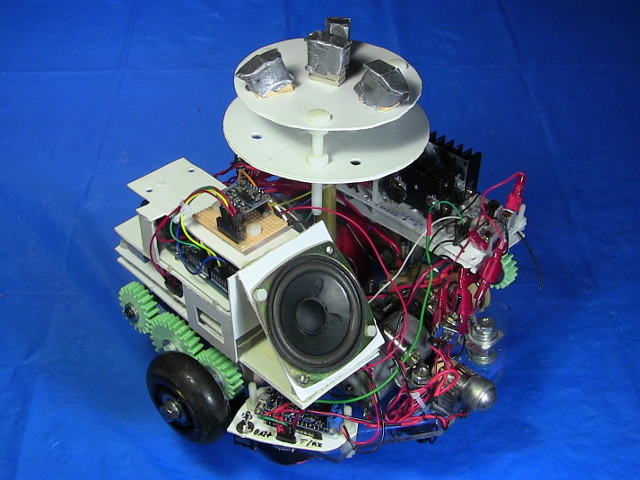
Below are photos of the drive system, or what's commonly called the hamster since it acts like a hamster running inside a ball, making the ball roll. Magnets at the very top are what keep the head on from magnetic attraction through the ball.
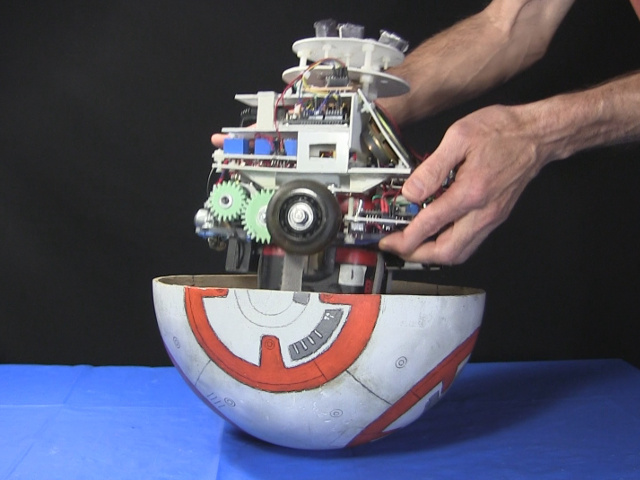
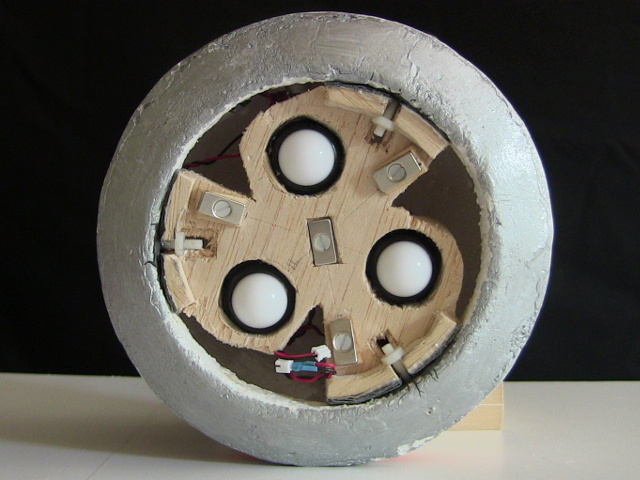
Below are some views of how the head is held onto the ball. You can see the magnets (taken from old hard drives) that are attracted to the ones mentioned above as a part of the drive system in the ball. You can also see the rollers, made with brass tubes and marbles, that keep the contact with the top of the ball fairly frictionless.

Making BB-8 (v2)
3D model for BB-8 (v2)
To help design and fit this BB-8 droid together I have a 3D model drawn up in Blender 2.71, a free 3D modelling and animation software. The model changes as my BB-8 changes. The latest version of it can be downloaded here:
bb8_design_v2_20170920.blend - 2.92MB, made using Blender 2.71 and the Blender Renderer (i.e. not Cycles)

Detailed BB-8 making pages
See the following webpages for much more detail about the making of this BB-8 (v2). Videos showing the making of it step-by-step are also below. You can find a BB-8 (v2) partial parts list here, including only the items I had to buy.


Video - Making BB-8 (v2) Droid - Part 1
The following video is part 1 in a series on making this BB-8 droid and shows it rolling around and turning followed by showing the making of it step-by-step. This is all the steps needed to get it to the point of moving around, including turning.
Video - Making BB-8 (v2) - How to Fiberglass - Part 2
In this video I show step-by-step fiberglassing the cardboard globe.
Video - Making BB-8 (v2) - Reattaching the Head - Part 3
I purchased new magnets and in this video I show how used them with a new head support and internal support to get the head working with the new fiberglassed ball that I made in part 2. As you can see in the video, it works great! But even then, the part 7 video below has some stuff regarding the head support that is an improvement over what was done in this video.
Video - Making BB-8 (v2) - Adding Gyro/BNO055 IMU - Part 4
The first working version wobbled quite a bit back and forth when stopping so I added a gyro, the BNO055 Intertial Measurement Unit (IMU) from Adafruit to detect that wobble and run the motors to counter it. This video shows adding it, as well as the work done so far in software to stabilize it.
Video - Making BB-8 (v2) - Painting/Details/LEDs - Part 5
Finally it was time to make BB-8 look like BB-8 by painting it, adding details to the head and LEDs inside the head. This video goes through it all step-by-step.
Video - Making BB-8 (v2) - Adding HC-05 Bluetooth RC - Part 6
I then switch from using the remote control taken from a toy truck that I described in Part 1 above, with an Android phone app using Bluetooth to communicate with an HC-05 tranceiver connected to an Arduino. This video goes through how to do all that.
Video - Making BB-8 (v2) - Improving the Head - Part 7
I wanted to change the rollers under the head to ones that roll better. I also change the way the head support attaches to the head. But at the same time I wanted to make the head weigh less so that it stays on better. Somehow I managed to do all that and this video shows how.
