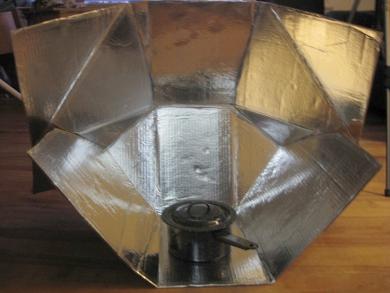
Teong Tan, a member of the
SolarCooking yahoogroup and owner of the
Sunny Cooker website uploaded this design for a Modified
CooKit solar cooker. The original CooKit is useful only for cooking
when the sun is low in the sky unless additional parts are added
so it can be tilted up without the cooking pot tipping over. Teong's
modification was that the cooker could be rotated vertically and turned
around such that the cooking pot would be placed on a different panel
and the overall orientation would be suitable for higher sun angles.
But at the same time it would still fold up to a reasonably small size
and be easy to make from a single 3 foot by 3 foot piece of cardboard.
Here are photos of the cooker in the two different positions.
Low sun angle position.
 |
|
High sun angle position.
 |
|
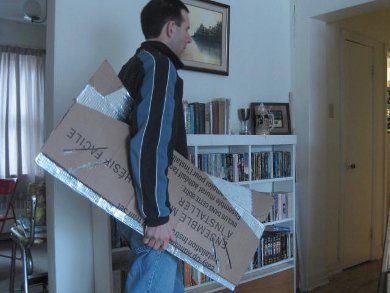
This is how I fold it up. Teong's template shows a more
compact way but it involves putting extra folds in the cardboard
which I didn't want to do.
 |
|
|
Testing the modified CooKit - 1 cup of water
I first tried testing when it was 4C (49F) outdoors. Unfortunately I
had my pot in just an oven bag. The temperature in the bag quickly
rose to 50C (112F) but wouldn't go higher as the heat losses equaled
the heat gains.
I next tried when it was -6C (21F) outdoors. This time I had my pot
in a pyrex container and the temperature quickly went up to 100C (212F)
in about ten minutes and stayed there. The pot contained 1 cup of water.
I left it for around a half hour and when I opened it up the water in
the pot was steaming and there was moisture on the inside bottom of the
pyrex container, obviously from steam that came out of the hot pot and
condensed on the cooler pyrex.
Cooking in the park.
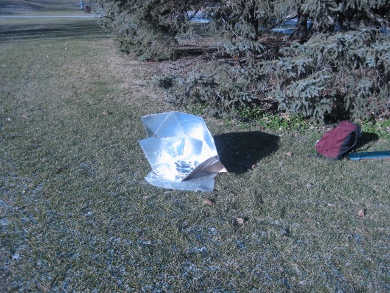 |
|
Black cooking pot and thermometer inside pyrex container.
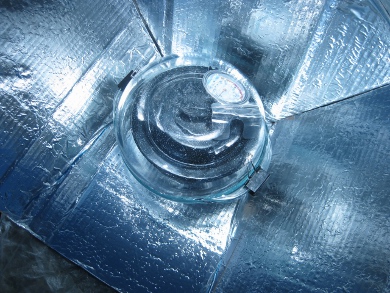 |
|
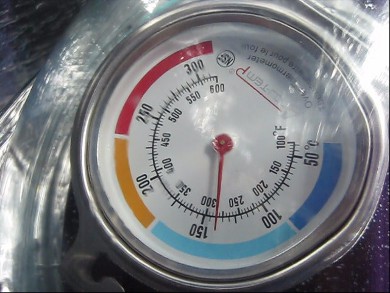
The thermometer showing 100C (212F).
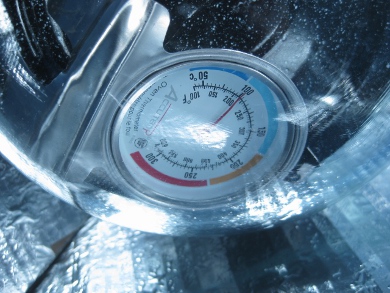 |
|
Cooking my Soya Rice Vegetable Concoction in winter
On February 20, 2012 I finally managed to do some cooking here at
45 degrees latitude north (Ottawa, ON, Canada.)
I'd tried earlier starting around 2:45pm but the sun really weakened
by 3:30pm, probably because it was so low in the sky and had to go
through a lot of atmosphere and it couldn't keep up with the below
freezing temperatures. But this time I started at 11:30am and by
1:00pm the temperature in the pyrex container was around 260F (125C)
and at 2:30pm it was 285F (180C).
Solar cooking in winter.
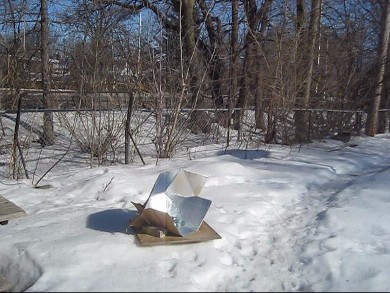 |
|
The thermometer showing 285F (180C).
 |
|
The finished Soya Rice Vegetable Concoction.
 |
|
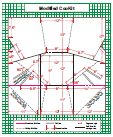
Construction of the Modified CooKit
Template
|
|
Click
here to get the template for the Modified CooKit. It's a pdf
file.
Drawing the template onto the cardboard and cutting and folding took
only about half an hour. However, I very carefully glued on the
aluminum foil, using a separate piece for each panel. This took
around an hour or more. It's hard to say since I had to run out for
more glue sticks twice, using up four altogether. Many other types of
glue can be used (e.g. spray on glue, liquid glue.) Just make sure
the glue works for both cardboard and metal.
Glue stick
 |
|
I used aluminum foil which works well, though over time aluminum will
lose some of its reflectivity, probably due to oxidation. Aluminum
coated mylar is another option that is far more reflective and will
work better.
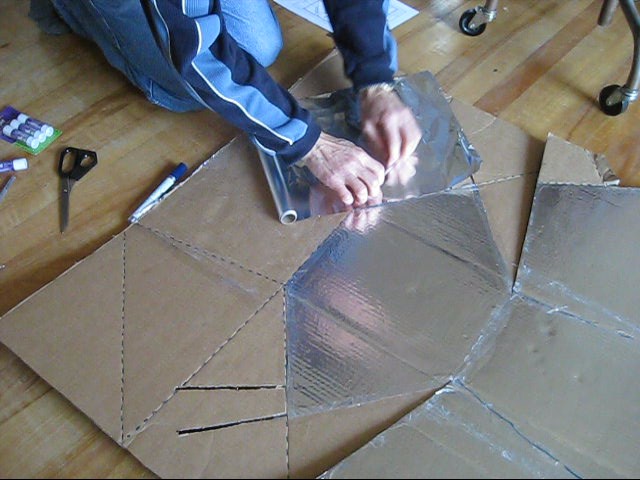
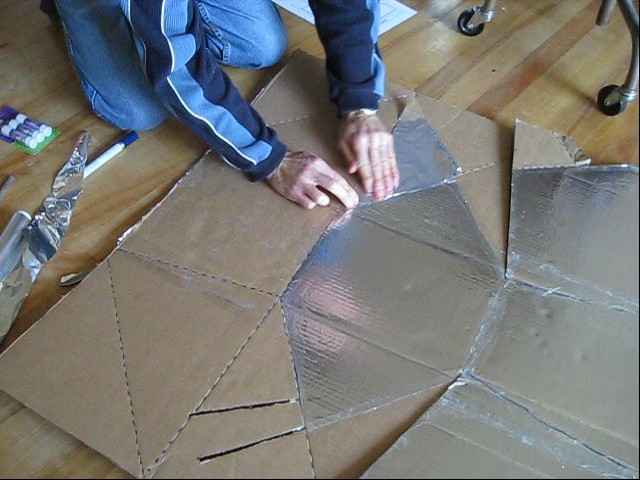
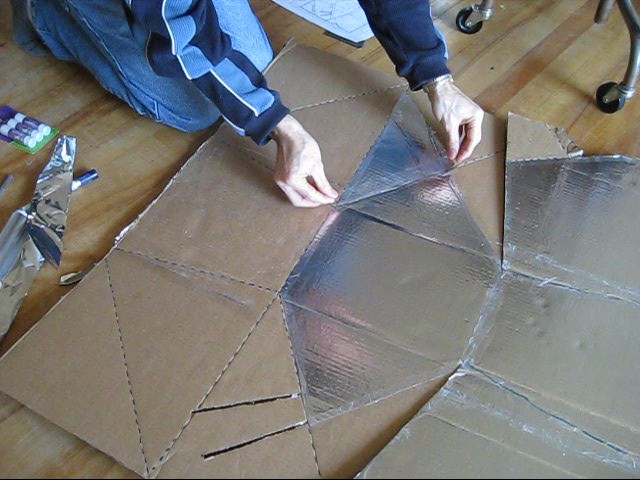
I took a lot of care to apply glue to the entire area so that the foil
would be as wrinkle free as possible. I first tried gluing an entire
12" x 3' area and laying out a 3' length of foil on it but the result
was not good; the foil was not stuck to the cardboard everywhere and
so would have reflected light in the wrong direction. I ended up doing
each panel individually, as you can see in the photos below, and even
putting clear tape on the edges so that when it was folded the foil
wouldn't lift up off the cardboard.
The following are the steps done during making of this Modified CooKit
solar cooker. Click on the images for larger ones.
Starting
 |
|
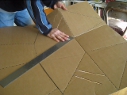
Cardboard marked
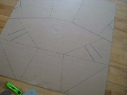 |
|
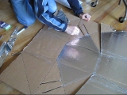
Cutting
 |
|
Folding
 |
|
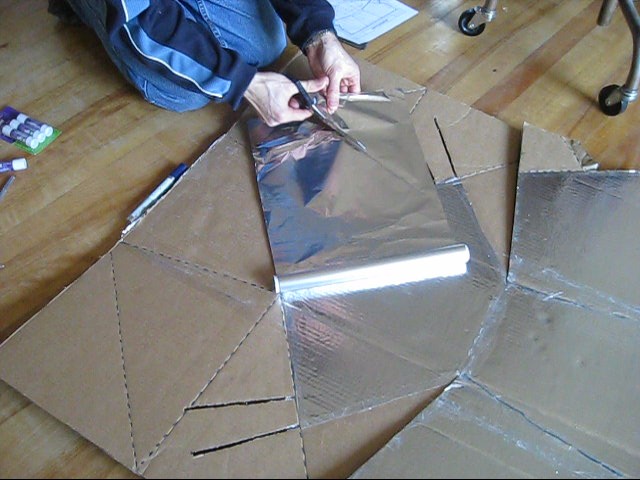
Measuring foil
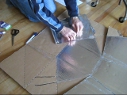 |
|
Cutting foil
 |
|
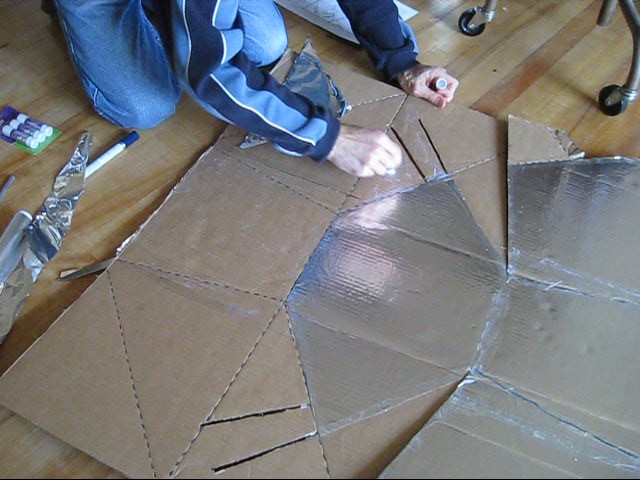
Applying glue
 |
|
Press foil in place
 |
|
Clear tape on edges
 |
|
The following video shows me assembling the modified CooKit and cooking
in below freezing weather as well as a bit about the cooking pot and
pyrex container and me making the modified CooKit in the first place.
And here's an excellent video by Christine Lilge
( ),
whose son made one of these modified cookit solar cookers for his 4th
grade science project. He even used the recipe I made in my
video above. This was done on May 13, 2014, at latitude 51 degrees north
with an outdoor temperature of 17C (63F). The video can also be
found on
their YouTube page here.
),
whose son made one of these modified cookit solar cookers for his 4th
grade science project. He even used the recipe I made in my
video above. This was done on May 13, 2014, at latitude 51 degrees north
with an outdoor temperature of 17C (63F). The video can also be
found on
their YouTube page here.