Mini solar tower versions 1, 2 and 3
These are my June 21 and 22, 2011, versions 1, 2 and 3 attempts to generate electricity using a very small scale solar tower, or heat tube as I sometimes call it. The source of concentrated solar energy is a large fresnel lens from a rear projection TV.
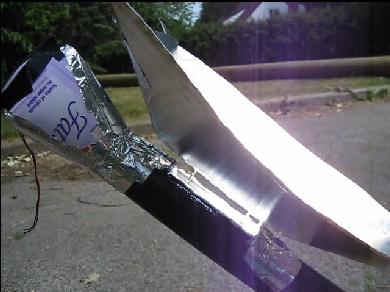
June 21, 2011/Version 1 - The ABS tube, heatsink and fan
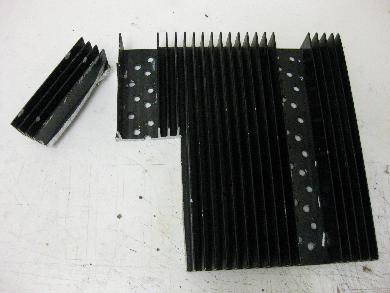
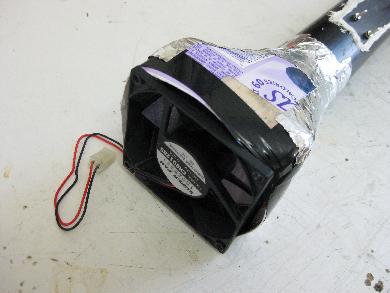
The very first version used a 1 1/2 inch inner diameter ABS tube as the tower. The absorber was a piece of aluminium heatsink normally used in electronics for transferring heat away from components like transistors and MOSFETs. I even attached a small computer fan to the outlet.
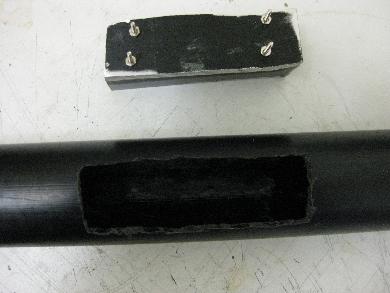

I didn't get very far with this one because the ABS melted around the area of the absorber/heatsink. This may have been because I was holding it at the focal point using my hand which wasn't very steady. So the ABS may have melted because it was sometimes at the focal point. It's also possible that it melted because the general area around the focal point was also hot.
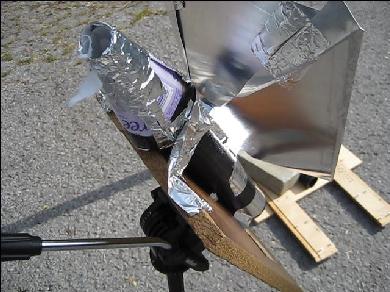
June 21, 2011/Version 2 - Protector/reflector added to version 1
To fix the melting problem I quickly made a reflector out of aluminium flashing, the kind you can buy in rolls at hardware stores (see photo below.)
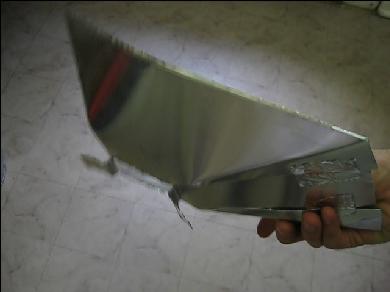
This solved the melting problem. It wasn't a very good reflector though since the reflector angles were too shallow but I knew that when I made it. I still didn't get a noticable airflow but using my hand I did notice that the air in the bottom of the tube was cool and the air just above the fan was hot.
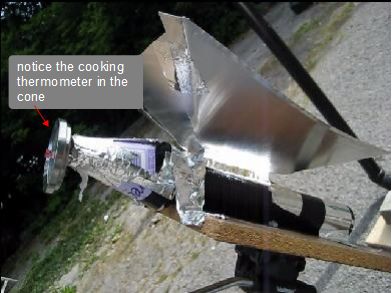
June 22, 2011/Version 3 - Version 2 with fan replaced by a cone
When airflow enters an area with a larger volume the air pressure and velocity decrease. That was the case I had with version 1, where the plastic pieces used to attach the fan created an expanding chamber. So in version 3 I removed the fan and put a cone with a contracting chamber instead, hoping for increased air velocity and pressure.
I still didn't get any noticable airflow and again I noticed the air temperature difference between the top and bottom using my hand.
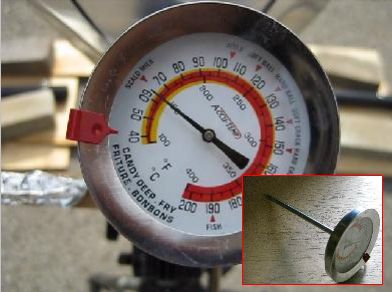
I also put a cooking thermometer (see photos below) in the tube such that the thermometer's long metal probe reached down into the tube and was in physical contact with the blades of the heatsink. The result with that was a bit disappointing in that the thermometer read 65C (150F) when the sun was out. As soon as a cloud blocked the sun the temperature would quickly drop and then quickly rise again when the sun was unblocked.
Video for versions 1, 2 and 3 of the mini solar tower
The following video is of versions 1, 2 and 3.
Conclusion
In versions 1, 2 and 3, the part of the absorber/heatsink that faced the sun was exposed to outside air. Since that was the hottest part of the heatsink the heat loss would have been greatest there. So in the next version I'll put the absorber inside the tube and reduce heat loss to the outside by putting a piece of glass in front.
Also, the heatsink was fairly thick metal with good heat conductivity but I want to transfer the heat as fast as possible to the air in the tube so I'll use a thin metal painted black for the absorber.
I'll improve the reflector by increasing the steepness of it's angles.
I may also go with a smaller diameter tube under the assumption that the volume of air was too large to heat quickly enough to create much airflow. But that may be too many variables to play with at once.
