How to build/make a Van de Graaff generator
This page talks about how to make this homemade Van de Graaff generator, though enough detail is given so you can make one that looks entirely different.
I also have a page of frequently asked questions (FAQ) that people have asked me over the years in trying to get theirs to work.
Videos - How to make a Van de Graaff generator
Part 1 How to Make a Van de Graaff Generator video
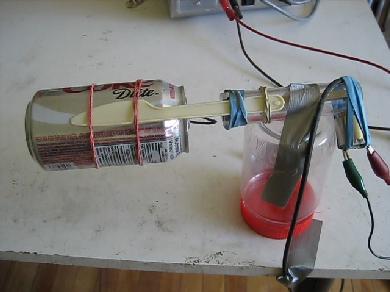
This video details all the steps in my making a Coke can Van de Graaff generator from scratch. This one isn't super efficient since only the wire from the brush at one end leads into the can. In the part 2 video below, we modify this one to be more efficient, but you still need to watch part 1 first.
Part 2 How to Make a Van de Graaff Generator video
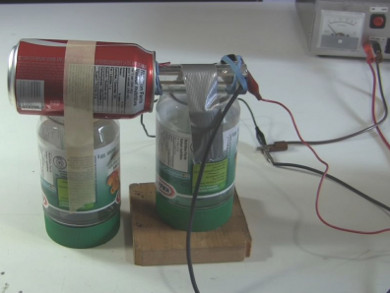
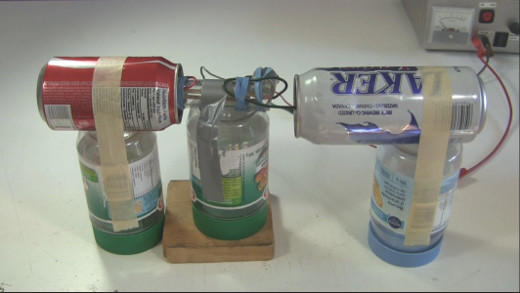
This one builds on the part 1 video above, showing how to make an improved dome for more efficiency as well as many options for grounding, using two cans, different roller options and using batteries.
Van de Graaff generator parts
The following are suggestions for parts for any Van de Graaff generator. See here for an example of the parts for a specific Van de Graaff capable of producing 500kV.
Motor
A lot of different motors will do. An easy source of motor for a very small Van de Graaff is a store like Radio Shack. Here's the one I used.
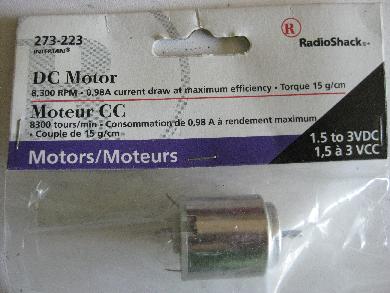
You do need a fast motor since you want the belt to turn fast. The faster it turns, the more charge it can pump over a given period of time. So the motor found in the bottom of a microwave oven for turning the tray would be no good because it's slow. However, a motor for turning a fan might work - if it's also strong.
The motor and its power source does have to be strong enough to turn the belt. If the belt is on very tight then the motor and power source (batteries for example) may not be able to turn it. To loosen the belt you could simply try another one that may be more stretched, or you could try moving the rollers closer together which would likely involve drilling new holes. But you also don't want the belt to be too loose on the rollers as that would lessen the triboelectric effect on which this all depends. For the effect to work you need lots of good surface contact between the rollers and the belt.
The tube or structure
A tube like those in the photo below is usually used to hold the two rollers firmly separated from each other. It also doubles as a structure for the entire thing. It's in fact optional. As long as you have some way of holding the various parts firmly where they need to be then you should be fine. You could even make a wooden frame or use a very solid box.
The tube must NOT be metal or any electrically conductive material.
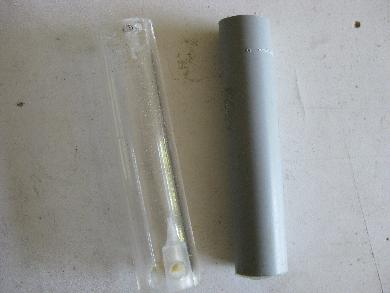
The clear acrylic tube I got from a specialty plastics store. The section of grey PVC electrical conduit I got from the electrical section at Home Depot and is normally used for running wire through.
The belt
Belts should be made of insulating material like rubber, vinyl, urethane, ... and should not be too thick (3/32" or 2.4mm, 1/64" or 0.5mm have worked well). If one or both of your rollers are non-metalic, i.e. they'll be doing triboelectric charging then they'll be doing that charging with the inner surface of the belt. That means the belt material should be far from the roller material in the triboelectric series table.
The easiest belt to get is a rubber band like the one in the photo on the left below. I happen to actually have bought a box of them but often mail is delivered to your door wrapped in rubber bands and sometimes vegetables like broccoli and kale are wrapped in them too.
Note that wristbands have been shown to not work as belts.
Belts for larger machines can be ordered online such as the ones listed below and have been reported to work well. I have a 1 3/4" rubber belt for my large Van de Graaff generator (see photo below on the right).
- McMaster-Carr (mcmaster.com) High-Performance Urethane Flat Belts - Part number 9485T19
- McMaster-Carr (mcmaster.com) Vinyl Laminated Nylon - Part number 8810K141, but these are just strips, you'll have to attach one end-to-end to make a belt.
- Science First - Search for "belt" and you'll find replacement belts. You'll have to contact them to find out what material they're made of. I have one from them from many years ago which is made of rubber.

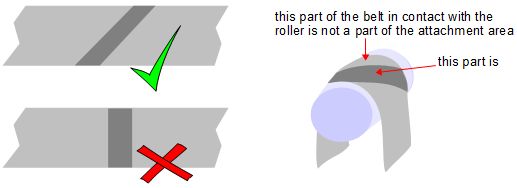
If you're splicing/attaching two ends of a strip of material together to make a belt then the area where the attachment is should be flexible so that it moves over the rollers snuggly. Also, make your attachment a diagonal one as in the diagram below so that when it moves over the roller, some of the belt is not a part of the attachment.
The rollers/pulleys
The rollers have to be carefully chosen and you may even need to experiment with different ones until you get a good result. Use the triboelectric series to choose your materials. A sample table is shown below.
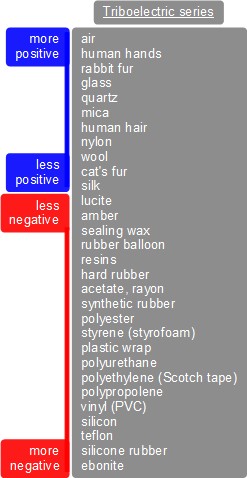
When selecting from the table try and find things that are at the more positive or more negative ends, not around the middle. Plastics are towards the more negative end. You can either:
- have the material from one roller be from one side of the triboelectric series and the other be metal (brass, copper, aluminium, whatever,...), or
- have the material from one roller be from one side of the triboelectric series and the other be from the other side of the triboelectric series.
The second option above will give better results.
The following photos are provided to give you some ideas for rollers and roller shafts. Walk around your house and look at everyday items; you'd be surprised where you might find the part you need.

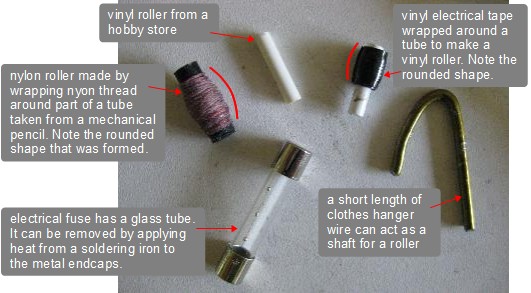
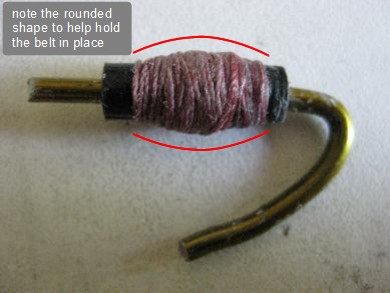
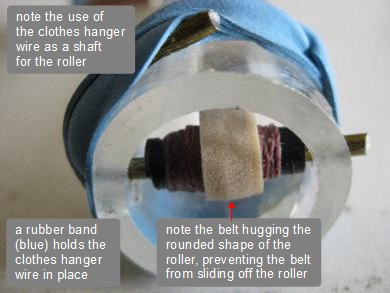
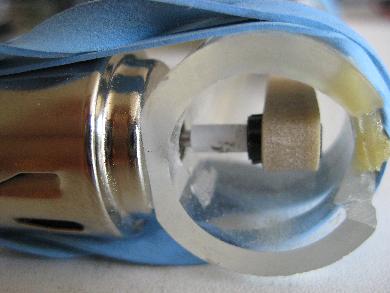
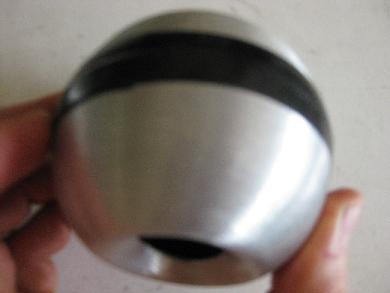
The best rollers are ones that are rounded as shown below. This rounded shape actually keeps the belt in place. This roundness is called a crown. As long as one of the two rollers has a crown then you should be okay. Why does it work? The basic principle is that the edges of the belt would have to stretch to get over the center of the crown and since they don't want to stretch, the belt tends to stay on. A basic rule of thumb is that the crown should vary by at least 1/8" for every 12" width of the roller, so the outer edges of a 12" roller would be 1/8" lower than the center of the roller.
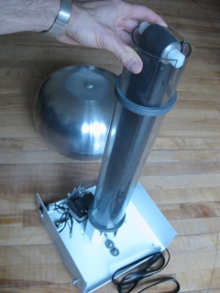
The dome
You want the dome to be metal and you want it to have no sharp edges, ideally. I used a Coke can which has lots of sharp edges and edges that are rounded but with a small radius. The same Van de Graaff generator would work a lot better with something that was well rounded everywhere.
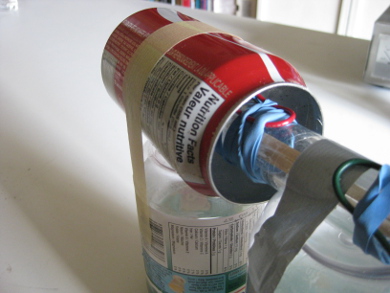
These bad edges can be improved a bit by insulating them. In the photo below you can see I've coated them with epoxy. Even then, doing this is no substitute for using something with only well rounded edges, but it's an improvement. I got better results by just cutting this end of the can open altogether as in the photo on the above left.
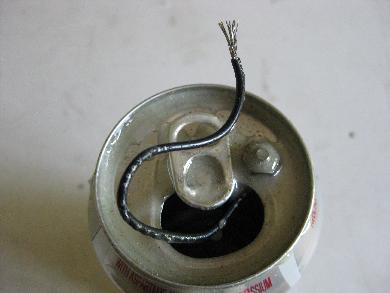
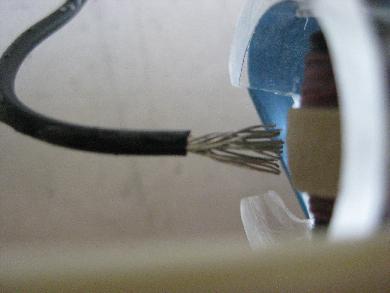
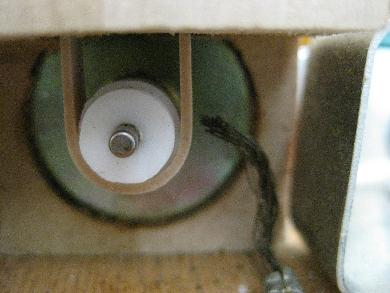
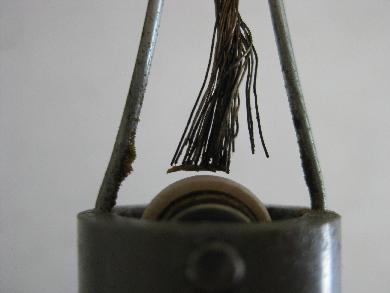
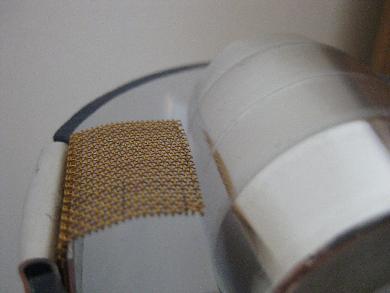
The electrodes (brushes or wires)
The sharp edged material near the belts that puts electrons on or takes electrons off the belt is called the electrode. Often it's just multiple strands of thin wire, but anything with sharp points can be used. The sharper it is the better it'll work.
Note that it must be as close as possible to the belt without touching. Although the electrode at one roller may be touching but the electrode at the other roller must not be. I sometimes have a grounded wire at one end that is touching the belt.
Video - How a Van de Graaff generator works
Here's a very detailed video I made of how a Van de Graaff generator works. This goes right down to the proton and electron level and includes the triboelectric effect used by the belt and rollers, the corona discharge between the belt and brushes, including the photoelectric effect at the negative brush, and the Faraday ice pail effect. Enjoy!
Video - Van de Graaff Faraday Cage Science Experiment
Prompted by a comment to my How to Make a Van de Graaff video above I did an experiment to see if it was just as efficient to put just the end of the wire from the top brush inside the dome (the Faraday cage) or to put the whole section including the top brush and made the following video showing the whole experimental process. I found it was 20 to 24% less efficient putting just the wire versus the whole section including the top brush.
Problems getting your Van de Graaff generator to works?
I also have a page of frequently asked questions (FAQ) that people have asked me over the years in trying to get theirs to work.
